When you first open the IDE and plug in the Arduino via USB cable, select the “Board” and “Port” as shown in the menu below.
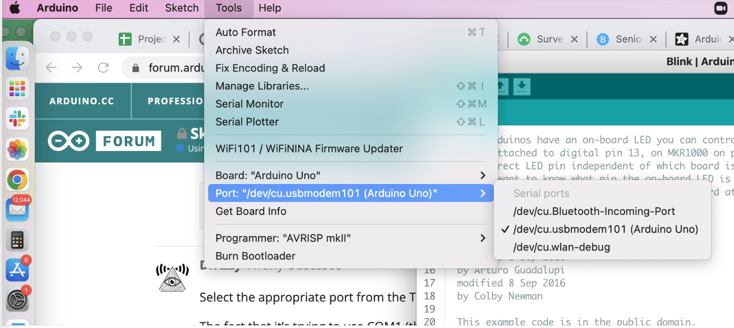
Getting the computer to recognize the Arduino’s connection can be finicky. I sometimes reboot when things aren’t working, and I’m always successful in the end. You can tell when a USB port has decided to temporarily shut down when you don’t see any new options appear under “Port” after plugging in the Arduino vs. when nothing is connected to USB. Whatever appears will not be exactly the same as the above screenshot, but select whichever port seems to correspond to your plugging/unplugging. Usually things just work, but it may take some experimentation, especially with knock-off boards.
The IDE comes with many examples in File->Examples, so you don’t need to do any coding. Open the “Blink” program first, read it through, compile (by hitting the Check Mark in the top left of the screen), then send it to the Arduino (using the Right Arrow next to it). If it works, you’ll see a blinking light on the board.
That’s it, that’s how to write and upload a program. Arduino will run it continuously for years on end, but if you want to “reset”, there’s a small black button on the board. Alternatively, just unplug/cycle power for the same effect.