I use the Serial Monitor for almost every program, during debugging. It’s the simplest method of output from the Arduino- just printing measured values to the monitor of the connected PC, as quickly as they come in.
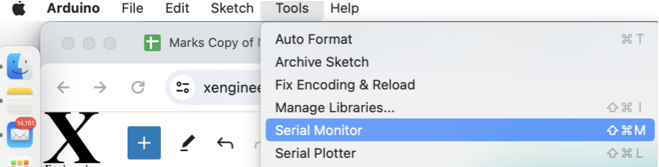
To open the Serial Monitor, select it from the Tools menu while the Uno is running and connected by USB cable:
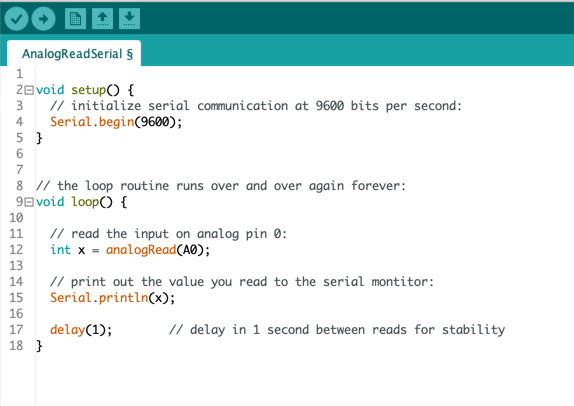
The code to run it is simple. For example, to print out values of Analog Input 0 (this example is right out of “Examples”):
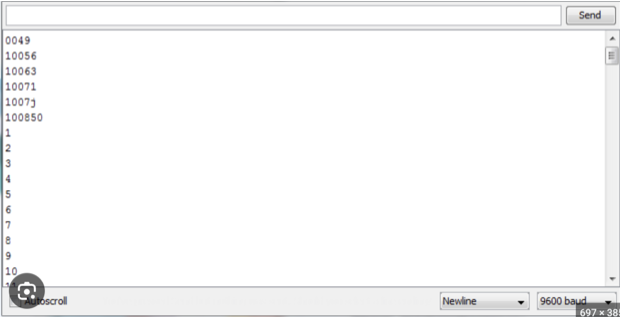
The monitor will look something like this:
Notes:
- The baud rate shown in the bottom right corner can be adjusted, and if the Monitor ever fails to work or produces gibberish, this is the first thing to check. Sometimes other parts of the program will have initialized (Serial.begin…) to other values for specific reasons, and the monitor must be adjusted to match.
- Only one device can use a computer’s Serial port at once
- “Serial Plotter” is another (initially tempting) option in tools, but due to limited functionality, I hardly use it. I prefer my cheap USB oscilloscope for looking at any signal that’s high speed enough to need something more than the basic text based Serial Monitor.
- The code statement “Serial.print….” does not print a new line after each new entry, and “Serial.println” does. 90% of the time I prefer Serial.println, unless, for example, I want a data label or engineering unit to appear on the same line.
- 9600 baud is 960 characters per second.
- The speed of the main “loop” that Arduino runs continuously depends on the code inside. If measuring one Analog Input, it will be < maybe 10khz. There are ways to go faster, but at that point, I think Arduino becomes the wrong tool.
- Slow serial rates can slow down the loop too much- to prevent this, I only use it for debugging, and try to use faster rates whenever possible.