Both the Hardware and the Software for Arduino projects can be thought of as Legos. You combine different pieces of other people’s work to suit your application.
Starting with Hardware, the lego blocks are often integrated circuit (IC) chips. A good example is the ADS1115, which is used to make very reliable voltage measurements on 4 channels.
This chip is too small to work with without tweezers and a microscope, and requires even tinier supporting passives (resistors, capacitors) to be useful. Luckily, companies offer “boards” for many IC’s. Here is Adafruit’s ADS1115 board, where you can see the chip itself, and supporting components already preconfigured.
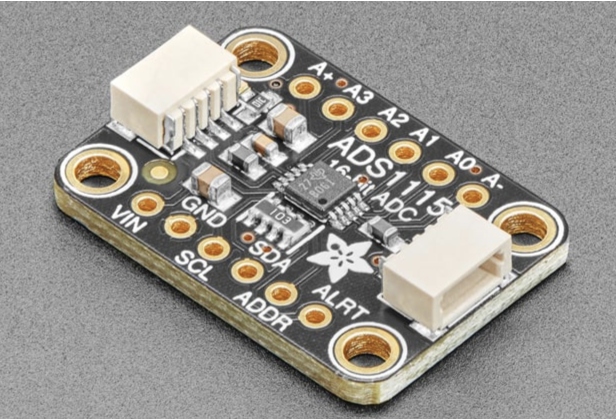
They’ve done the tedious work for us for a fair price, and provided a more convenient means of connecting wires (use either the white connectors or soldering right to the gold thru holes).
I usually find IC’s and “boards” using google search, with phrases like “4 channel voltage measurement board for Arduino”.
Once the hardware is chosen, matching software legos (aka libraries in Arduino-speak) loaded into the Arduino IDE. This is done with the Tools->Manage Libraries button.
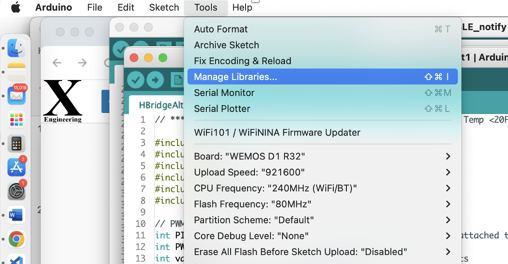
In this case, search for ADS1115, and there are a few options to select from. Adafruit is a good company, so if available, I usually select libraries with this brand in the description, or other recommendation from somewhere. That being said, I have never had and issue with a “bad” library yet.
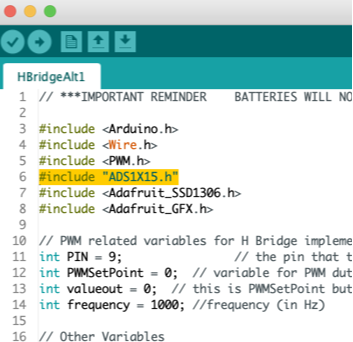
Once the library is installed, to use in code, you must include it at the top of the code with a #include line like this:
Here is more info on libraries, including how to install and use them on different operating systems.
Most libraries that are useful for beginners are available from the Arduino IDE Library Manager. As you get into more advanced projects, you’ll find that some can only be found on Github or other sources, and the installation process is a little different.