Introduction
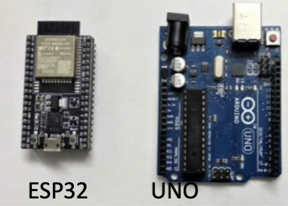
The ESP32 is another microcontroller, sort of a competitor to the Arduino Uno, and it’s better in almost every way. It’s just as cheap, ~60x faster, with ~200x more memory, ~3x more IO, and has built-in bluetooth and wifi capability. ESP32 can (for the most part) run the same programs as the UNO, and working with it is overall very similar.
Possible disadvantages- ESP32 operates with 3.3V supply and logic level instead of 5V, and some IC’s only work at 5V. This means level converters may be needed for some applications. Although programming is nearly identical, not ALL Arduino libraries work with ESP32. There may be small differences, and there is less DIY community around the ESP32 (but still plenty), so learning can be a little more challenging. There are also a bunch of different ESP32 versions, which can be confusing. Finally, the Arduino UNO form factor is so popular that more Shields/Hats fit this physical size. Luckily, because of this, there are companies making ESP32’s in Arduino Uno form factor, and this eliminates one disadvantage.
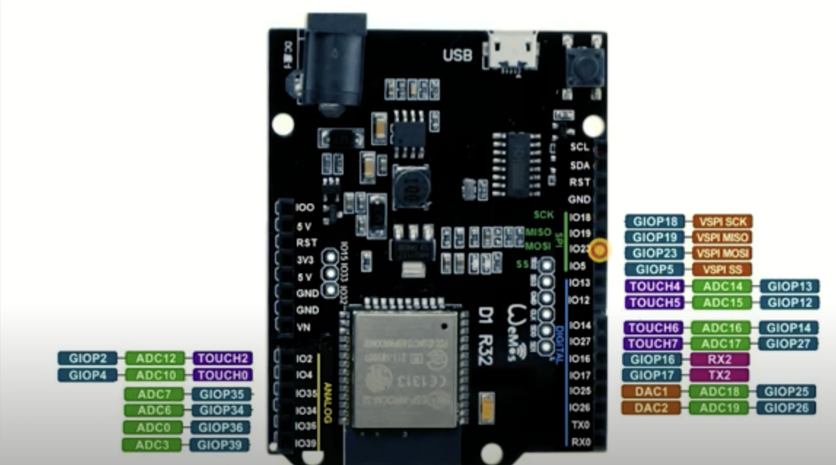
ESP32 in Arduino Uno form- pin ID’s and layout:
Procedure to connect to Arduino IDE and run a program:
- Install Arduino IDE (if you don’t already have it from playing with the UNO)
- Arduino->Preferences->Add https://espressif.github.io/arduino-esp32/package_esp32_index.json to the “Additional Board Manager URL’s” field
- Install ESP32 library (may reverse order with prior line, not sure)
- Adjust settings in newly appearing menus in “Tools”
- Defaults should work after selecting WEMOS d1 R32
- Plug board in to pc/laptop using mini usb cable
- Verify a new board has appeared in the board menu
- Select that board
- Open a Tools-> Serial monitor and set to 115200 speed
- Press reset button on ESP32 board. You should now see some new text appear in serial monitor if you have a successful connection
- Bridge GPO0 to GND with a jumper wire, leave connected for now
- While bridged, tap the reset button (black one on the board itself)
- The serial monitor should be waiting for a program
- Keep jumper jumped
- Compile and Upload code as per usual w the IDE buttons
- The ESP32 takes a lot longer to program than the Arduino
- When complete, remove jumper (If the upload failed, try changing the upload speed (see image below) to a slower value, and start over. I found this necessary on some boards, not others)
- Press reset button again
- The new program is now running
Tips
Maybe don’t use the 5V pin. Some users report bad behavior when powering the board through this pin, or when drawing power from it. Best to supply power using the 9-12V input, and supply 5V required at any other components from a separate power supply. Well, I tried it and had no problems with 5V input connected to the 5V pin.
ESP32 Input-only GPIOs 34-39 do not have internal pull up resistors available. There are a lot of caveats to ESP32 pins to be aware of, good summary here.
